


One of the most common questions our lab gets from doctors is how to handle a crown under an existing partial denture. Here are the steps you can follow from Spear Education. Feel free to call our technicians if you need additional guidance.
Select this link for a two-page handout with photos for each step.
Prepare the tooth and make an impression with your desired impression material. Make sure you have plenty of prep clearance around the clasps and rest seat. Then seat the removable partial denture and express some bite registration material (medium to light body is probably easier than something hard and rigid for trimming purposes).
Be sure to cover the clasps and rest seats. Once set, remove the removable partial denture and the registration and carefully start trimming back the material until you expose the outer surfaces of the clasps and rests and any material that will prevent you from releasing the removable partial denture.
Push the index out of the partial by gently pushing on it apically. You will be able to see some of the preparation of your tooth in this registration and you want this so that the lab can index it on the die (from the first impression you made). Be sure to put it in a box when sending it to your lab to protect it during shipping.
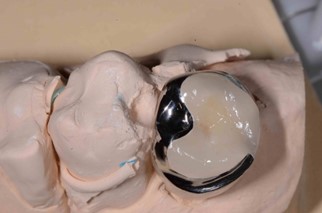
Once at the lab, the bite registration will be fitted on the die and pattern resin will be flowed into the grooves of the clasps and rests. It also will need to extend down onto the model where the minor connector portion of the removable partial denture would be.
Once this has set, the lab will cut away the registration material and utilize the resin clasp assembly to construct the contours of the crown.